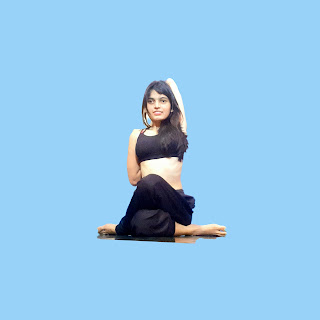
The Journey of Yoga Explains Cow Face pose
Target: Shoulder, Arm, Groin, Spine
3. Cow Face Pose:
Step by Step instructions:
- Before you start this pose, start with Dandasana.
- Sit on the Yoga mat or on the floor and then bend your knees and cross your right leg over the left leg.
- Twisting the right knee on the top of the left leg. Tho top leg should be fold towards inward and the down folded leg should be stretched towards outside.
- Sit evenly on the sitting bones.
- Inhale and Stretch your right arm from upward side and bend it towards down over the shoulder.
- Bring the left hand from the back downwards to the top, then stretch your back and keep your body slightly straight.
- Now open your palm in back and put one hand over the other and hold it together.
- With the full exhalation, tuck the forearm in the hollow of your lower back.
- Stay in this pose for 15 sec to a minute.
- Release your hand and unwind your leg to come back to the actual position.
Benefits:
- This pose is very useful for induction relaxation.
- It reduces anxiety and take out tiredness of the body.
- This pose gives you confidence and dedication by stimulating abdominal organs like liver and kidney.
- It relieves back pain and stiffness in the shoulder and neck.
- This pose is excellent for digestion.
Caution:
" Avoid doing if you have heart or back problem. Also if you have injury don't try it without consulting to the Doctor. "


0 Comments